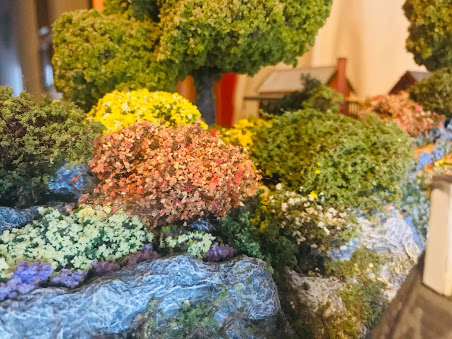
How To Make Trees Made Out Of Rope
We had collected some packets of trees on our travels over
the last 10 years but when I came to making the mountain just like the flowers,
weeds and shrubs I very quickly realized that we were going to need a whole lot
more. I priced them online and didn’t want to pay the prices they were asking for them amount and we were going to need so many
trees and not to mention the lack of variety to choose from, especially when I wanted gum trees, wattle trees, autumn trees, cherry blossom trees and just plain green trees of varying green foliage, so I decided to make my own.
On the
internet they show a few different ways to make the trees. But the type that
interested me was ones made with string and rope, these look more do able for
my first set of trees.
Here is a
list of the following tools and items that you are going to need to make your
own rope trees:
-
String
and/or rope. For the larger tree’s it is better to use rope because the rope
with be stronger and hold better. For the smaller tree’s string is fine.
-
Sharp
scissors to cut your string and rope.
-
Flocking,
you will need a couple of shades of plain green, and some that has been
premixed with the colour you want on your tree’s.
-
Cheap
hair spray with a good hold factor of at least 5.
-
Spray
booth, not essential but I used this disposable one that I made up for spraying
the hair spray and the paint on my trees. It does help to not get the spray
everywhere.
-
Mini
air compressor and spay gun, or a can of very dark brown paint.
-
Baking
paper.
-
Some
type of trays or tubs or even egg cartons for sitting you trees in to dry.
And some disposable gloves.
Above is my
home made spray booth.
Below is my
mini air compressor and spray gun, one of my favorite tools.
Above is a
plastic tub that my hubby drilled holes in the lid for me to propagate some of
my cuttings in but know I use for drying my rope trees on.
Below is a
make shift drying tray that I used to dry my rope trees.
First you need
to cut your string and rope into the different lengths that you require for
your trees. I cut them at varying lengths around 3, 4, and 5cm, but be careful
not to go much bigger for these trees because they will just collapse after you
spray paint them. I speak from experience, lol.
Then like the
weed tufts that I have shown in an earlier blog you just start untwisting your
rope and string leaving about 1cm or 2cm at the bottom for the trunk of the
tree.
Once they
are all untwisted they are ready to spray with your spray can of dark brown
paint or your spray gun with very watered down burnt umber paint. It might be time to also put your disposable gloves on know. Making sure
your cover the branches and the trunk of your string and rope trees. Now let them dry.
Once the
paint is dry you need to spray the branches with the hair spray and then drip
the tree branches into your container of cut string and set aside to dry.
Feeling a
bit like I’m becoming a hobbit, very sticky job, perhaps disposable glove are
needed. Lol.
Once the
hair spray has dried then you need to spray your trees again with the burnt
umber paint and set aside to dry again. This could take up to 24 hours to dry
properly.
Once they
have completely dried it is time to re spray the branches and foliage of your
trees with hair spray again and dip them into your flocking and then set aside
to dry for 24 hours. Then they are ready to be planted in your train layout
garden, your war diorama, or even you dolls house garden.
I hope that
you found this helpful and if you have any questions please feel free to leave
them in the comments below.
I do hope
you have a lot of fun making these guys as I did.
Take care
and see you next week.


Comments
Post a Comment